Download the plug in here (download software and instructions)
Spaceclaim has created a plugin that allows Mastercam® and Spaceclaim users the ability to transfer solids, surfaces and wireframe between the two systems, both directions, seamlessly, without loading files.
This is beneficial for SpaceClaim customers looking for a CAM solution and Mastercam customers looking for a powerful geometry editing and preparation tool.

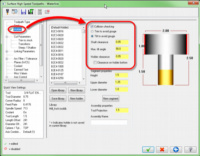
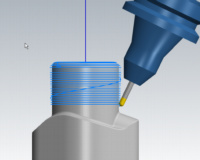
Starting back in Mastercam X8, you’ll see an option in all of your High Speed Surface Finishing toolpaths. This is the easiest and fastest way to create a multiaxis toolpath without any complicated parameters. Waterline, Scallop, Horizontal Area, Raster, Pencil, Spiral, Radial, Hybrid and Project all have this feature displayed under the “Holder” section of the toolpath:
This setting will cause the toolpath to tilt the tool away if the shank of the tool or the holder is going to collide with the wall of the object. This makes it extremely easy to use the shortest tool possible to machine the part, giving you the best finish possible.
This feature does require a multiaxis license and a fully 5-axis capable post and machine to use.
If you’re not currently a Mastercam Multiaxis customer, contact us today for an evaluation!
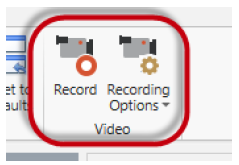
A new feature has been added for both Backplot and Verify. The Home tab now contains a video group that allows the user to save a .mp4 file from their verification session.
Click Record in the Home tab to begin recording. Once it has finished, click Record again to stop recording. You will be prompted to save the .mp4 recording to a desired location on your computer.
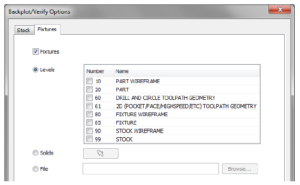
Added fixture support was available in X9 and now in 2017 it has been improved. You can now select a solid, multiple levels or browse for a file to be used as a fixtue
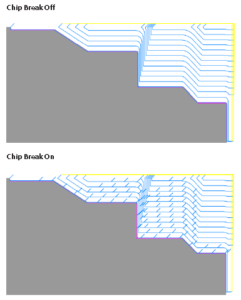
A new option and dialog box has been added to the Lathe Rough and Lathe Contour Rough toolpaths to establish when chip breaks occur. Select the checkbox and click Chip Break to open the new dialog box from the Rough parameters and Contour Rough parameters tabs.
This is helpful when working with materials such as plastics, aluminum or other stringy materials. You may set length and time conditions, retract and dwell options.
Google Drive is a great way to create revisioned backups at milestone points of your choosing by just pressing ALT-S or clicking on “Save” in Mastercam. Open a Google Gmail account if you don’t already have one at Create Google Account. Then go to Google Drive to create a free 5 Gigabyte Google Drive account. Download and install the Google Drive software and follow the instructions to create a Google Drive folder on your machine. Point Mastercam to your Google drive – any folder structure you want under the Google drive folder. You can set this folder as your default MCX folder. Any file saved to that folder will automatically be synced to the cloud. Once it is synced, you will be able to visit your Google web drive (cloud) and from there you can copy the file, email it, right click on it and see the revision history, with the ability to restore previous versions.
Files are saved to the Google Drive only when they are copied or saved into the local folder. Multiple users can modify a file (each must have their own Gmail account) and you can see who saved a particular revision. You should do some research on the security of the Google Drive, plenty of information is available on the internet.