- March 28, 2023
- Posted by: MCAM Northwest
- Categories: Mastercam, Tech Tip

Applications Engineer John Stauffer explains how to tune your system and hardware settings to get the most optimal performance for Mastercam.
By John Stauffer
Tuesday, March 28th, 2023, 11:00 AM PDT
The time has finally come: You’ve been asking for a new computer for Mastercam programming and you finally got one! It’s supposed to be much faster and more powerful than your last computer. You get Mastercam installed and all of your posts are loaded. But as you start programming, you notice that this computer isn’t that much faster than your last one. What gives?
There are a few settings in Mastercam that might need to be adjusted in order to get all the performance possible out of it. By default, some of these settings barely even scratch the minimum capabilities of some modern hardware. Before we go changing a bunch of settings, we should get a good understanding of how our system is behaving as-is. What is the best way to test this? Well, Benchmarking of course!
Here is a great part file you can use for benchmarking. Click here to download the part file (you can also find the file link on mcamnw.com/downloads). Open this file in Mastercam (ignore any warnings about it being from an older version, this does not matter). If the toolpath has any dirty operations, go ahead and regenerate them. We will use the regeneration time of this file to learn how your system performs.
The best way to do this is as follows:
1. Shut down any other programs you have running on your computer
2. Open the part file you just downloaded in Mastercam
3. In Mastercam, select all operations for the part
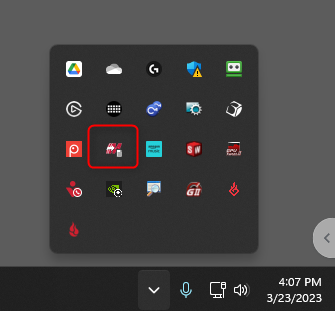
4. Go down to your Sys tray and open the Mastercam Event Log. Double click to open
5. Right-click in the white space and select the option to clear the log
![]()
6. Go back into Mastercam and regenerate all operations. Don’t do anything with your computer while this runs for the best results
7. Once all operations have completed the regen process, you will see a full list of operations performed by Mastercam in the event log
8. Take a look at the time column. You want to find the difference in time between when you clicked regenerate and when all operations were completed. The difference in time is your benchmark time
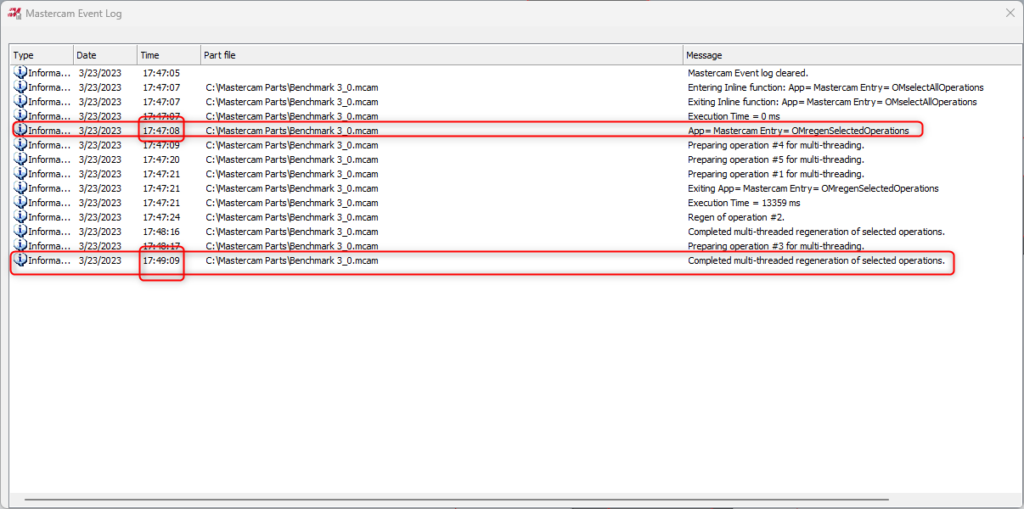
- The first entry to consider is labeled as “Entering Inline function:App= Mastercam Entry =OMregenSelectedOperations”
- The last entry to consider is labeled as “Completed multi-threaded regeneration of selected operations”
- NOTE: Do NOT use the “Execution time = xxxx ms” time in the messages column. This number is misleading and doesn’t give a great explanation of the test as a whole.
9. Now we can compare. See the list below to understand your computer’s relative performance:
- Less than 2:30 = Great system! Perfect for heavy Multiaxis, complex 3D milling, or Mill-Turn loads (I currently hold the forum record at 1:58!)
- 2:30-3:45 = Good performance. Great for 3+2, 3+1, moderate 3D work, any 2D work. A bit of a wait on heavy loads
- 3:45-5:00 = Passable performance. Great for simple 3D work, most Lathe toolpaths, most 2D work. Will have a harder time with complex modeling or any toolpaths that are a little tougher. With patience this could work, but will eat up programming time over the course of a day
- Over 5:00 = Simple work only. Basic contouring, drilling, simple lathe toolpaths. Anything more than this will severely tax your computer and use up valuable programming time. The time spent waiting for the computer will pay for a new computer in a short amount of time in many cases. Remember, people get faster at their jobs, computers don’t!
Let’s go through the settings you should adjust and how to adjust them properly.
Step 1: Know Your Hardware!
We won’t know what settings to adjust or how to adjust them unless we know exactly what you’re working with. There are 3 main hardware components that will affect Mastercam performance based on settings. The CPU (Processor), the GPU (graphics card), and the RAM (Random Access Memory). Here is how you find information on these components:
CPU
- Right-click on the Start button in Windows, then select “system”
- Under the Device specifications you will find the processor. Make sure to jot down the make and model of the processor (For example, Intel i9-12900kf or AMD Ryzen 5600X)
RAM
- In the same Device specifications page you will see the amount of installed RAM. Jot down how much you have installed
GPU
- Open the Windows Start menu, then type in “Device Manager”. Open the Device Manager from the Start menu
- In the list, find the Display Adapters group. Expand the group
- If you have one item here, you will need to determine if this is a dedicated graphics card or “onboard” or “integrated” graphics. You can use your favorite search engine to find out more information
There are some important notes to make here about the GPU. “Onboard” or “integrated” graphics are not supported in Mastercam. This doesn’t mean they won’t work, but there are generally performance penalties and/or graphical glitches in these systems. You may want to look into upgrading the graphics in your system by getting a dedicated graphics card or upgrading the computer. Dedicated graphics are supported and recommended for Mastercam. For the graphics card, just make sure you update the graphics card drivers so they are fully up to date. You can find driver updates from the websites of the manufacturer (AMD or Nvidia).
If you have two items here, then you have a hybrid system. This means your CPU has “onboard” or “integrated” graphics available, but you also have a dedicated graphics card. In this scenario, you will need to go through the process of ensuring that the dedicated graphics are being used for Mastercam. This is covered in the following KB article: How do I enable dedicated graphics with NVIDIA or AMD for Mastercam – myMastercam.
Step 2: Adjust Settings
Now that we know the hardware, we need to get an understanding of how the hardware relates to settings in Mastercam.
CPU
Put the name of your CPU into your favorite search engine. You should find a result that tells you how many Cores and Threads your CPU has. Many modern CPUs are capable of multi-threading (also called hyperthreading). This means that the cores each have 2 threads available to them. The number of threads that your CPU can handle is more important than the number of cores.
Once you know how many threads you have available:
- Launch Mastercam
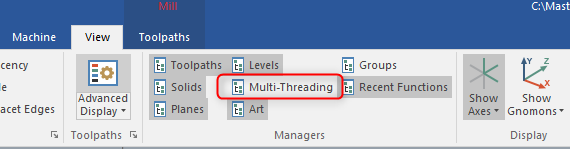
- Go to the View tab
- Open the Multi-threading Manager from the Managers group
- Click the exclamation point button near the top
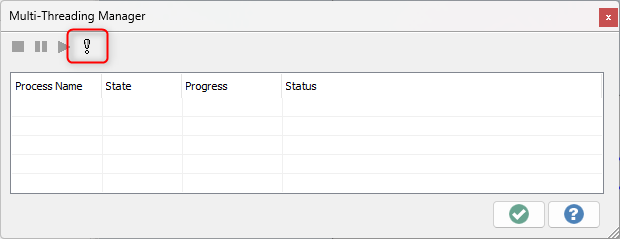
Now we need to consider how to set the Maximum number of threads. This determines how much of your CPU is allowed to be used at once in your system for Mastercam. The maximum number you can put here would be the same as the number of threads available for your CPU. However, you generally want to leave some available for other tasks such as print reading, email, and maybe a music player or something.
For instance, I have a 24-thread capacity in my system, but I limit the number in Mastercam to 20. This allows other programs to continue running smoothly while Mastercam runs. If you only have 8 threads, then leaving this at 4 is probably a safe bet, but you could increase it to 6 and see how your system behaves overall.
Of course, for best performance, it’s better to turn off all other programs, but in most cases, this is unnecessary.
Once your max threads are set, we need to set the default priority. This is set to “Normal” by default. This field can be changed to “High” instead, which will prioritize Mastercam computations over other programs. Using the “Real Time” option does not seem to have any significant effect.
RAM
Now let’s talk about RAM. RAM is used in all programs on your computer, but most programs don’t eat up too much of it. Interestingly, the Windows operating system is usually one of the programs that will use up the most RAM, so we want to make sure that the amount that we allow Mastercam to take isn’t too much to slow down Windows. It doesn’t matter how fast Mastercam can run if Windows can’t keep up. We can find the setting for RAM under File/Configuration/ Toolpaths.
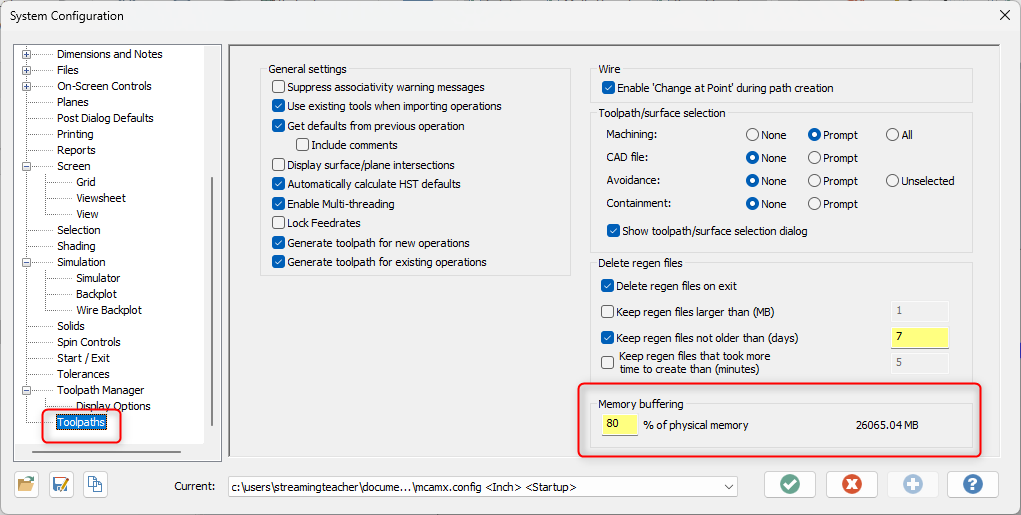
In the lower left of this configuration window, there is a field where we can specify how much RAM we will allow Mastercam to use up for toolpaths and storing toolpath data. This is labeled as a percentage. To set this we need to consider what else you might do on that computer at any given time. If you only run Mastercam, then we just need to make sure Windows has enough to keep up. Generally, 8 GB is a safe number to leave for Windows. That means if you have 16 GB installed and you want to leave 8 GB for Windows then leave this at the default of 50%. If you have 32 GB installed and only run Windows then we could increase the percentage to 75%. However, if you are also running other programs, then you want to make sure you leave some available for the other programs.
At 32 GB of installed memory, you might still want to leave this at 50% if you have several other programs running, particularly if your programs require a good amount of RAM to run (Looking at you, Google Chrome!). With 64 GB installed, you could probably bump up to 75% even with other programs running, unless they are very heavy programs like Solidworks.
There isn’t really anything we need to do about the graphics aside from what was outlined earlier. As long as you have dedicated graphics, you have ensured that they are being used for Mastercam (in hybrid systems), and you have your drivers up to date you should be good to go.
Step 3: Benchmark Again
You can run the benchmark again and see if the changes you made to your system made any significant impact on your benchmark time. You can continue to tweak the settings and rerun the benchmark until you can’t get a faster result. At this point, your system is tuned for Mastercam!
Follow MCAM Northwest!
Facebook: @MCAMNorthwest
LinkedIn: mcam-northwest
Twitter: @MCAM_NW
YouTube: The MCAM Northwest
To view and register for upcoming MCAM Northwest Mastercam webinars, visit our Events page.