- July 26, 2023
- Posted by: MCAM Northwest
- Categories: Mastercam, Product Spotlight
Take full advantage of Mastercam Multiaxis’ powerful features, with and without full 4 and 5-axis simultaneous machining.
By Callie Morgan
Wednesday, July 26th, 12:18 PM PDT
Looking for more control over your milling toolpaths? You need Mastercam Multiaxis. Multiaxis is a Mill 3D Add-on that gives you complete control over the cut pattern, tool axis control, and collision avoidance for full 4 and 5-axis simultaneous machining. The best part is that you don’t even need a multiaxis machine to take advantage of some of the powerful tools available in Multiaxis.
Difference Between 3+1, 3+2 and Full Simultaneous
If your machine doesn’t support full simultaneous motion, Mastercam Multiaxis toolpaths can be locked to a 3+1 or 3+2 approach. Full simultaneous machining moves the rotary axis while the tool is cutting while 3+1 and 3+2 machining locks the tool into an angle. This provides more flexibility for your cutting motion and allows you to do any machining you want. 3+1 and 3+2 have a shorter travel distance and less rotation for the tool, which means more accessible programming. This also provides more flexibility for your cutting motion by providing the tool access to features not aligned with each other by rotating the part as needed for access. Most of the toolpaths in the Multiaxis group can be limited to work in just 3 or 4-axis* in the Tool Axis Control page of each toolpath.
*The Rotary, Rotary Advanced, Blade Expert, Port Expert, and Port toolpaths can’t be locked to only 3 or 4-axis.
Full Support for Circle Segment Tools with Accelerated Finishing
Accelerated Finishing is a Mastercam toolpathing technology that optimizes cutting strategies for barrel, lens, lens-barrel, oval, and taper tool shapes to increase material removal and finish quality without increasing machine cycle time.
You can access circle segment tool styles with just a Mill license, but it is limited to 3-axis with no undercutting. To compensate areas above the equator of the tool with Accelerated Finishing, you will need Mastercam Multiaxis.

Multiaxis toolpaths have the advantage of the Tilt at Side option, which allows you to cut down the sides of walls with barrel tools, utilizing all sides of your tool for even wear.
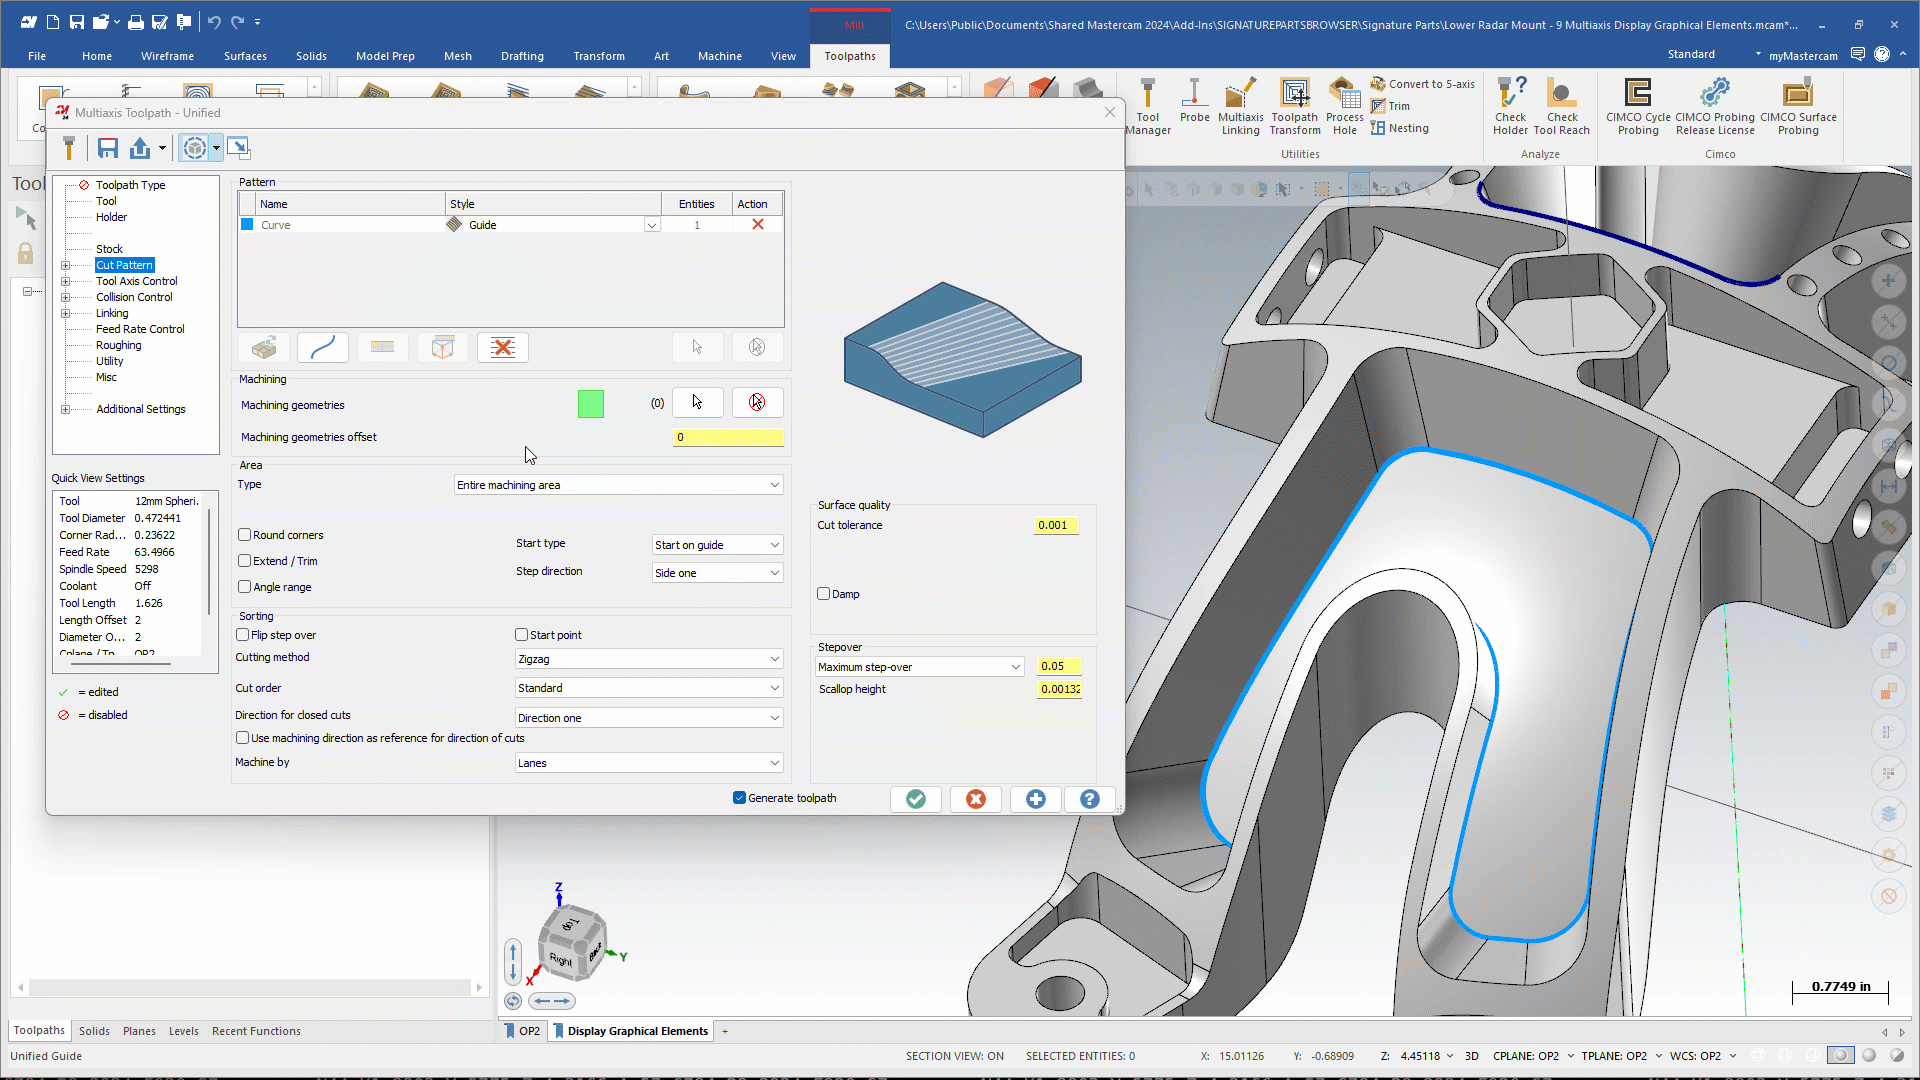
Unified Toolpath for Multiaxis
Having a multiaxis machine is not required for using the powerful Unified Toolpath in Mastercam Multiaxis. If you make injection molds, using Unified will be a huge game-changer for your programming efficiency.

Unified is a way to streamline 3D finishing by putting all finishing move cut patterns in a single interface. It also limits the number of settings and parameters needed to make your parts correctly and accurately.
New Color Coding
You can now set the color of machining geometries, Collision Control selections, and Pattern entities within the graphics window. These colors can be changed per user, and only display while the parameters screen is open. This can be highly beneficial for complex Multiaxis toolpaths where a programmer might forget which geometry is selected for machining geometry or avoidance. This allows you to see what is selected in the background, without having to open any selection dialogs.
New Deburring Updates
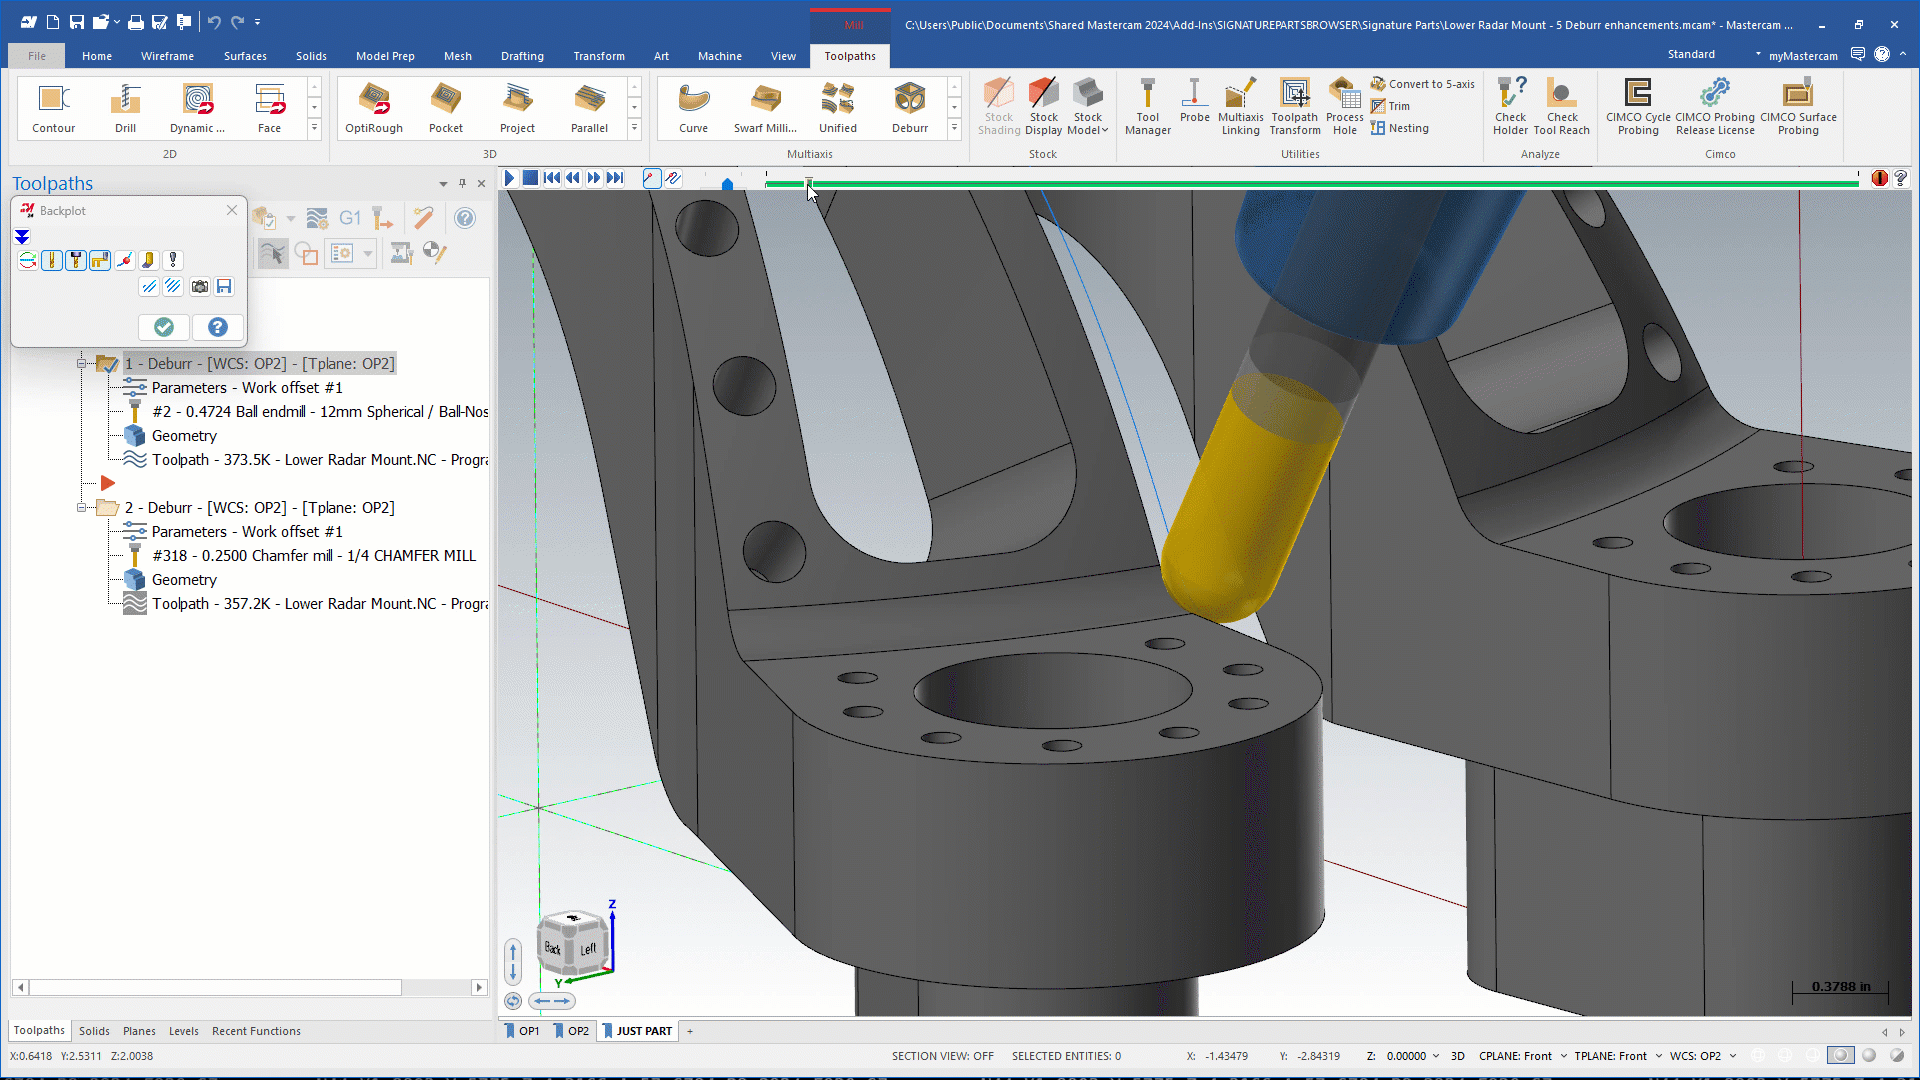
The Deburr toolpath can drastically reduce the amount of post-machining processing your part needs to go through to be customer-ready.
The Deburr toolpath in Mastercam 2024 now includes support for a new tool-saving feature when using a Ball endmill or Lollipop tool. The Avoid Contact on Tip option in Deburr keeps the tip of the tool off of the edge from being deburred. This option is especially important when using a lollipop tool or a ball endmill, as the tip of the tool is essentially at 0 SFM, which could cause burrs. Moving the contact point farther out on the tool will improve cut motion and tool life.
New Pocketing and Roughing for 3-Axis
The Pocketing toolpath can adjust the vector of the tool while it cuts. In a multiaxis setup, you can have the tool follow the walls of the pocket either in a positive draft or negative draft direction. In Mastercam 2024, you can lock the Pocketing Toolpath to a 3-axis environment.

This means you can get pocketing motion that follows the floor curvature of a pocket that is not flat while keeping the tool in a locked orientation. In some cases, this can be beneficial for semi finishing a pocket in a 3-axis machine to get a more even amount of material on the floor before finishing.
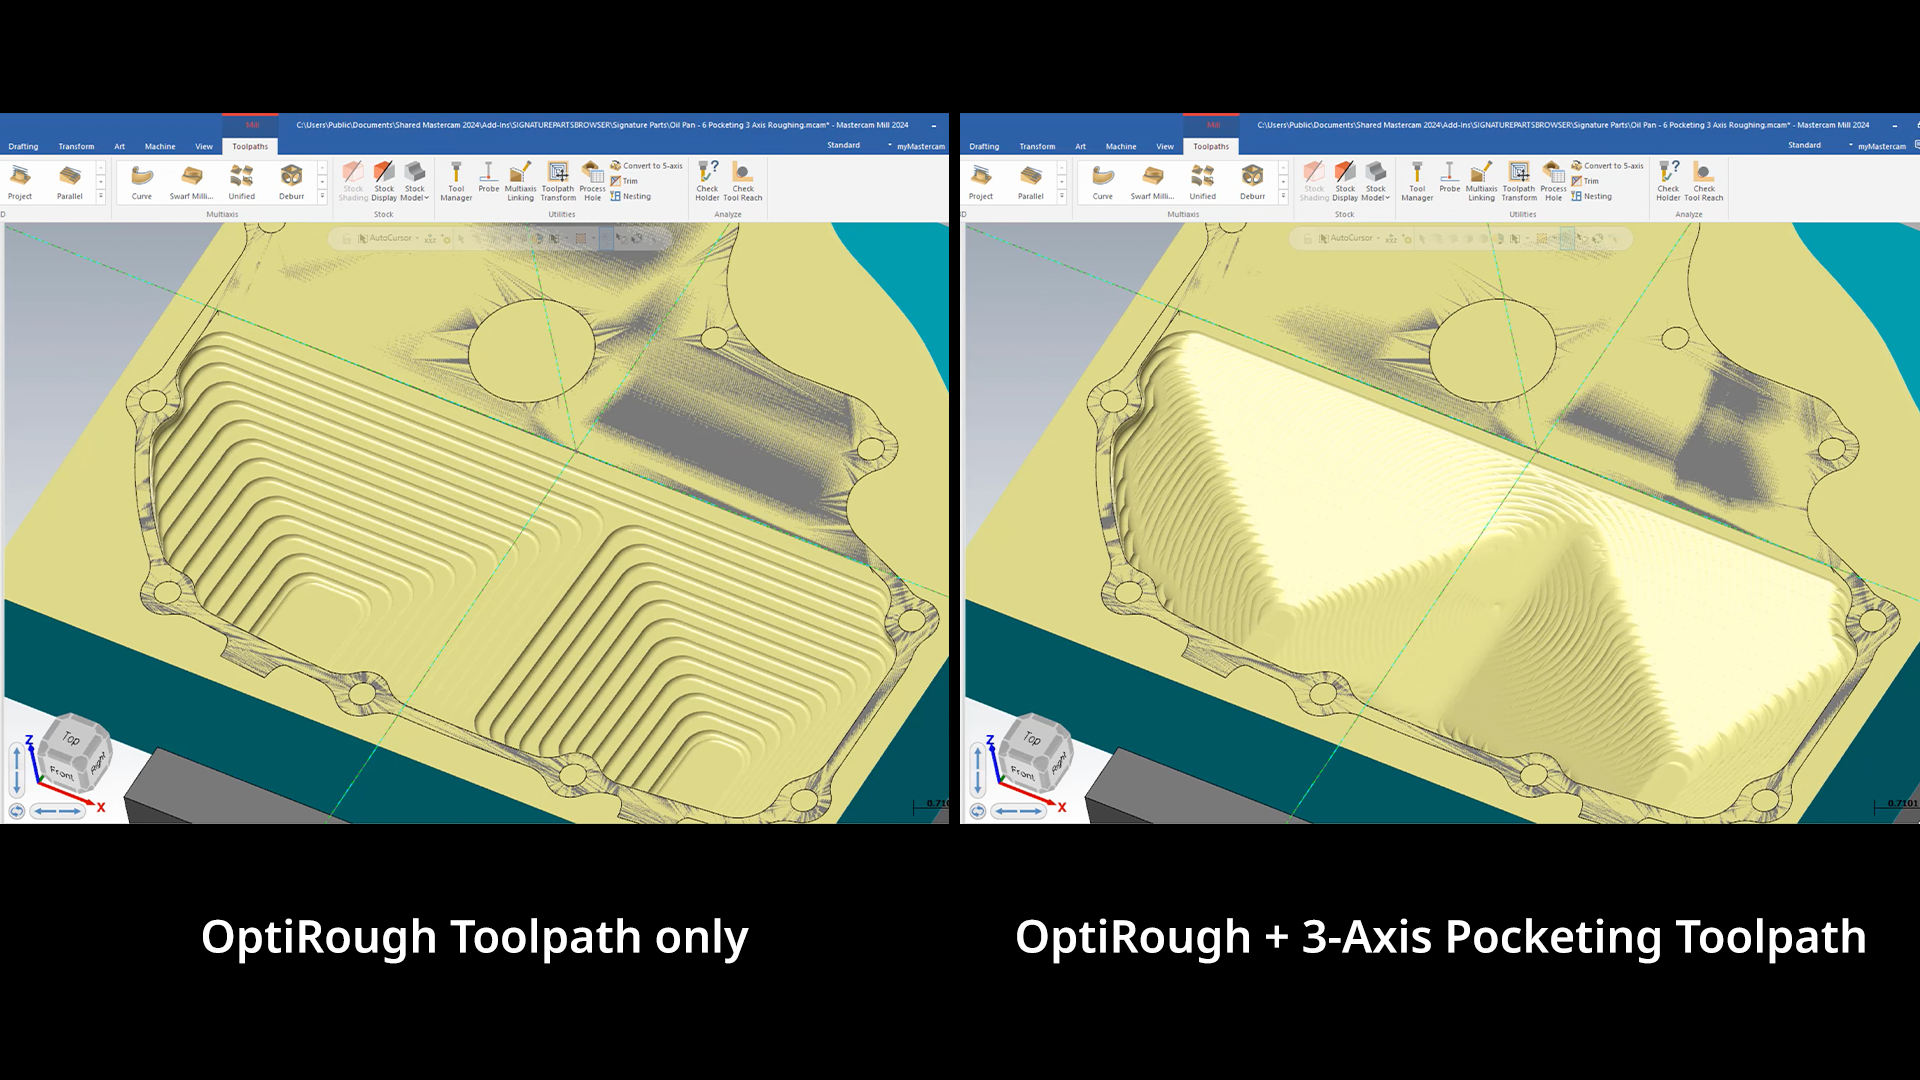
Using OptiRough by itself can create stairstepping. You can use OptiRough for roughing operations, then use a Pocketing Toolpath locked to 3-axis to semi-finish and level out the steps, creating a much smoother result.
To see some new Multiaxis features for Mastercam 2024 in action, check out the recordings of our Mastercam 2024 New Feature Breakdown Part 1 and Part 2 on our YouTube page!
If you are looking for powerful, efficient features that will take full advantage of your multiaxis and 3+1 and 3+2 capable machines, contact our sales team for a quote for Mastercam Multiaxis today!
Follow MCAM Northwest!
Facebook: @MCAMNorthwest
LinkedIn: mcam-northwest
Twitter: @MCAM_NW
YouTube: The MCAM Northwest
To view and register for upcoming MCAM Northwest Mastercam webinars, visit our Events page.